

Photo Lessons in Japan - Step3
Composition and Focus
From artistic point of view, Photography is almost the same as painting. By taking DSLR photo lessons prologue to step2, you are able to create photos as you want - like an art class student learning how to paint pictures. Now, I have a question - what do you want to create (paint)? Is it landmarks, your family, flowers, or a Kawaii model? Let me call it "subject" of the photography.
The composition means, how do you create (paint) a picture of the subject, within a limited frame (space) of photo. OK, so how can we improve the composition of our work? The best way is copy the composition of the photos that you are impressed with. But first, it is worth to know common errors and popular theories.
Common composition error
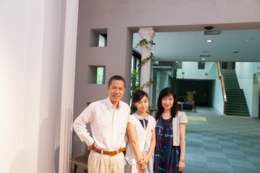
You may have seen same type of photos many times. Why? Because your camera leads to this composition. By using a default set-up of DSLR camera with zoom lens, the picture tends to become like this.
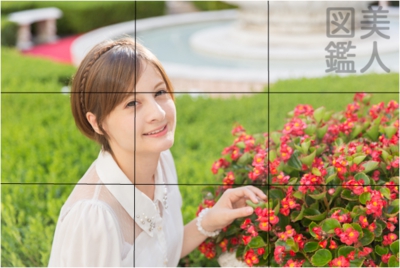
Rule of Thirds
Rule of thirds is the most poplular theory that many professional photographers apply. Please imagine breaking your view finder into thirds (both horizontally and vertically) so that your photo is divided into nine as follows. Some DSLR camera can physically show these lines or grids in the view finder or LCD monitor.

Having open space on left side this composition gives us more natural feeling. This is because when people viewing an image, their eyes usually go to one of the intersection points rather than to the center of the image.
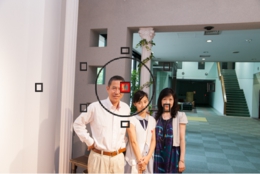
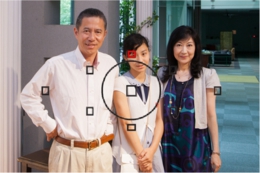
Move Focus Points
OK, now you understand the "Rule of Thirds". By following the rule of thirds, you will place the subject on guidelines.

The way of moving focus points differs from camera to camera - so that you should read your camera's users guide again. Some DSLR camera has dedicated button for moving focus points - as we move focus points so often. Please practice in moving focus points as you want by watching out the subject through a view finder.
Practice Session E)
Take Horizontal Pictures by "Rule of Thirds"
OK, let's take pictures of "rule of thirds". At the same time, Let's control depth of fields as well.
1) Visit some nice open place that you can use as background. Place an object or a model (subject) away from background. Set a mid- telescope lens i.e. 50mm - 100mm, Apply A (Aperture) mode and aperture open (low F number). Be as close to the subject as close as you can while making the appropriate composition.
2) Show "rule of thirds" guideline or grids in your DSLR camera's view finder or LCD Monitor if possible. Place the subject in line with the vertical guideline or grids.
3) Move the focus point of your camera, and place it on the subject. For shooting a model, lock the focus point on the model eye (the eye which is closer to you). Then shoot!
4) Check the photo taken via LCD monitor. If necessary, adjust brightness by changing shutter speed. OK, but how? I would suggest apply M (Manual) mode that we have learned in practice a) - this time aperture is fixed, and change shutter speed for adjusting brightness.
5) Move subject or yourself, and try placing the model on the other side of "rule of third" grid. Ask the model to make various poses, if possible. Compare how the photos differ if the subject is moved from right to left, or vice versa.
Photography Lessons Fee in Tokyo or Yokohama
Per person's charge JPY 10,000
- 1.5 Hours for private lessons
- 3 hours for group lessons (minimum 2 persons). Further discounts applied on 3 or more students group lessons.
- Available on Tokyo or Yokohama. Lessons in the other city (i.e. Kyoto) requires additional fee.
Kawaii Model Fee for the Photo Lessons
per person's charge JPY10,000
- 1.5 Hours for private lessons
- 3 hours for group lessons (minimum 2 persons). Further discounts applied on 3 or more students group lessons.
- A kawaii model will be arranged by Santos, subject to the availability of the model.
